FD4Cast models offers a comprehensive and flexible management interface for payroll records, salaries, employee expenses and so on. For users who don’t want to micro-manage specific employee expenses, the model also offers a general input sheet which is explained below.
Payroll details can be input into the model by click on ‘Payroll’ on the FD4Cast ribbon, as shown below:
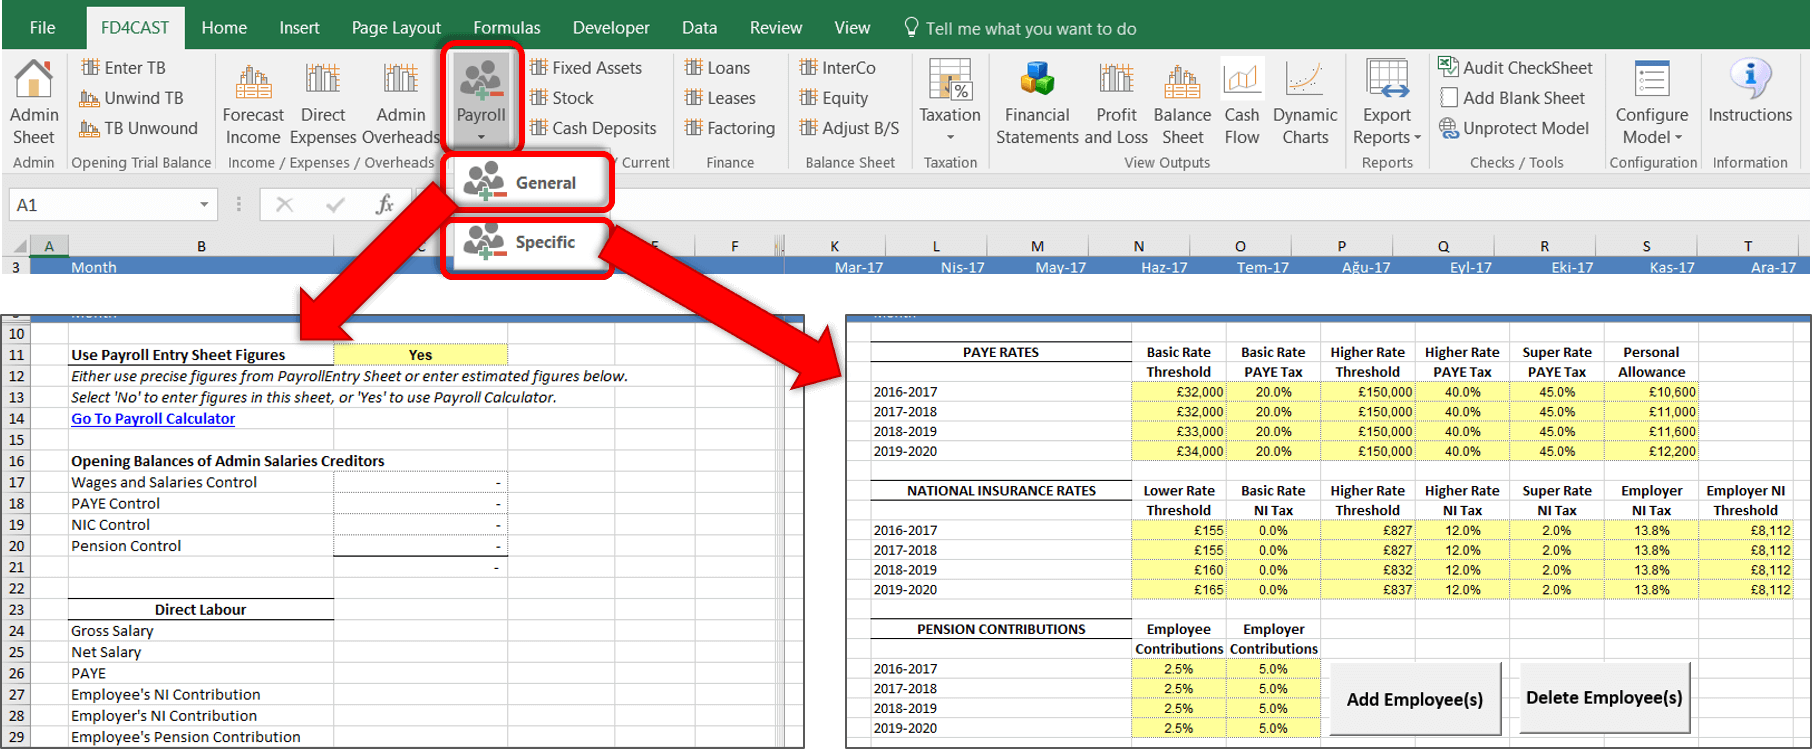
After clicking on the Payroll button, 2 options are presented:
General: This is for users who don’t want to micro-manage the employee salaries. Sum of direct labour and admin overheads can be input per month. Report output figures are generated at the bottom of this section.
Specific: This is where user can manage the employee expenses, salaries and taxes in detail.
When Specific option is selected from the Payroll menu, the user is sent to the PayrollEntry sheet.
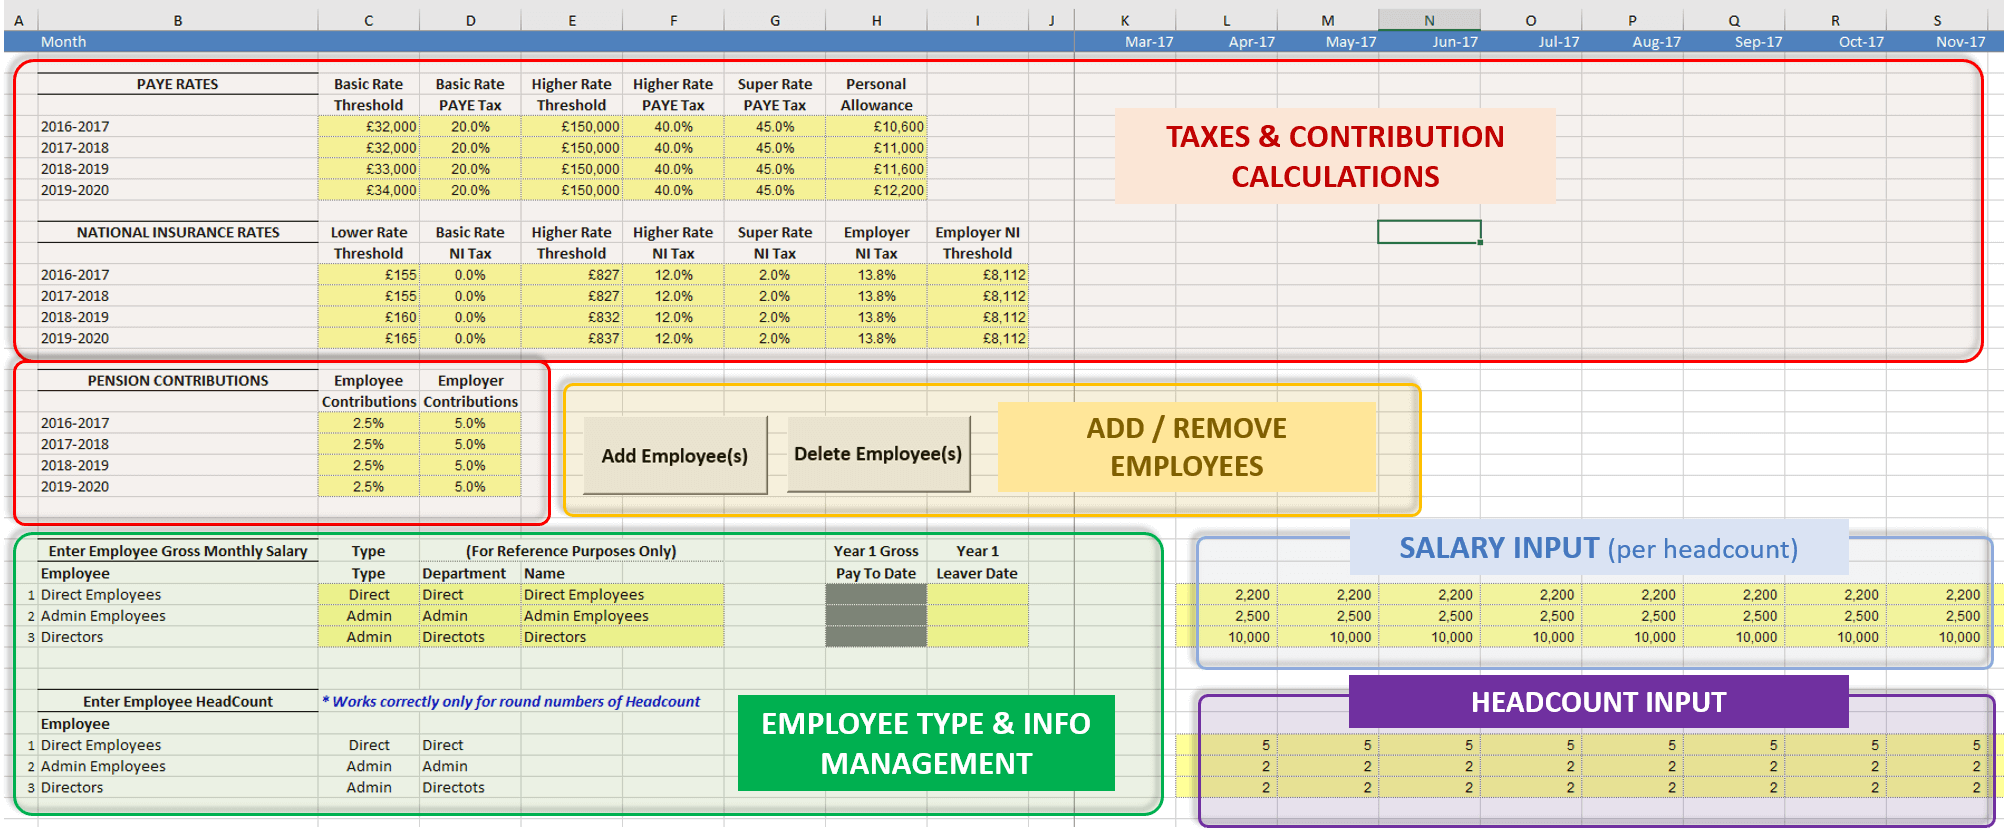
Please find below detailed explanations of each sub-section:
This section (red area, top of the screen) is being used to determine three main payroll tax factors:
The user is able to define thresholds, tax rates to be applied after reaching each threshold, and pension contributions to be applied for each employee. These values are used to calculate the total employee cost to the company besides salaries.
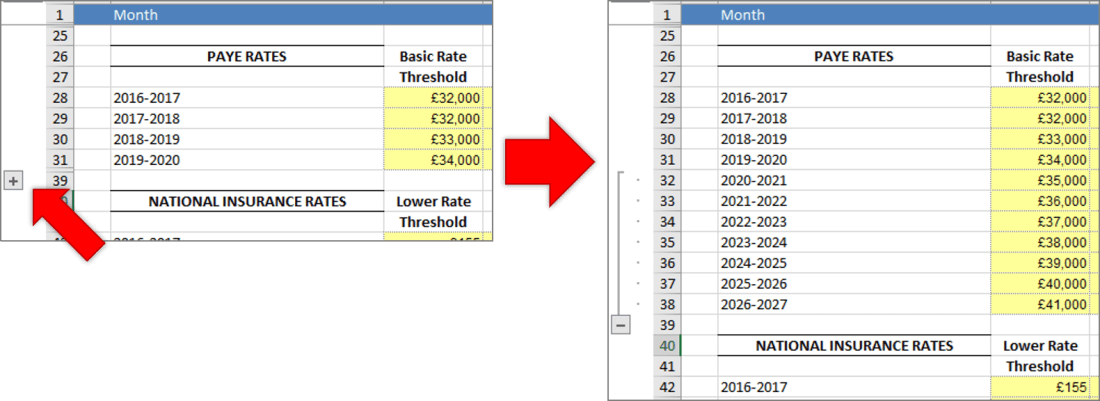
The user is able to add more assumptions for the upcoming years by clicking on the little “+” buttons on the left side of each table:
In this section (yellow area, middle of the screen) there are two separate buttons for adding and removing employees. When clicked, user is prompted with a popup asking to input the number of employees to be created or deleted:
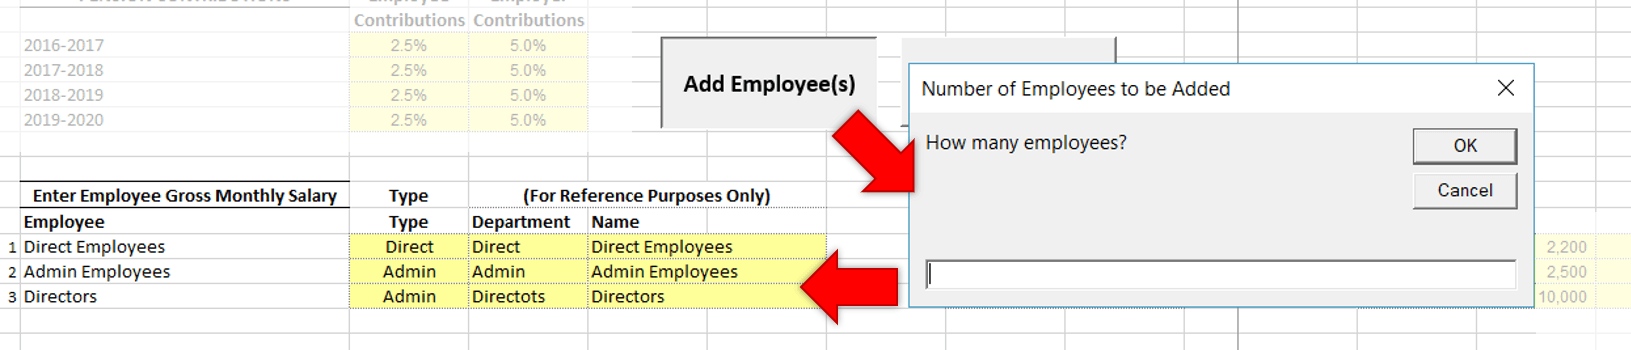
These new employees will then be added to many tables like salary, headcount, tax calculations, reports and so on.
** An idea for adding employees is to “group” them. You don’t have to add all employees individually. You can create a new employee and name it as “Sales Team” and another employee as “Sales Managers”. After creating employees as groups, the headcount in each employee/group can be defined from the headcounts table. Grouping employees with same characteristics will save the user time compared to separate employees.
In the employee info section (green area, bottom left) the user can define the employee type from the dropdown selection (this affects the tax calculations). Also, employees can be renamed simply from the Name column. Department info is optional and will be used for reference purposes only.
In this section, users can also select when a specific employee left (or is planning to leave) the company. This will affect the total salary calculations.
After adding/removing employees, defining their info we can now add salaries and headcounts for employees. Note that, salaries are added per individual.
Below is an example with grouping logic mentioned previously:
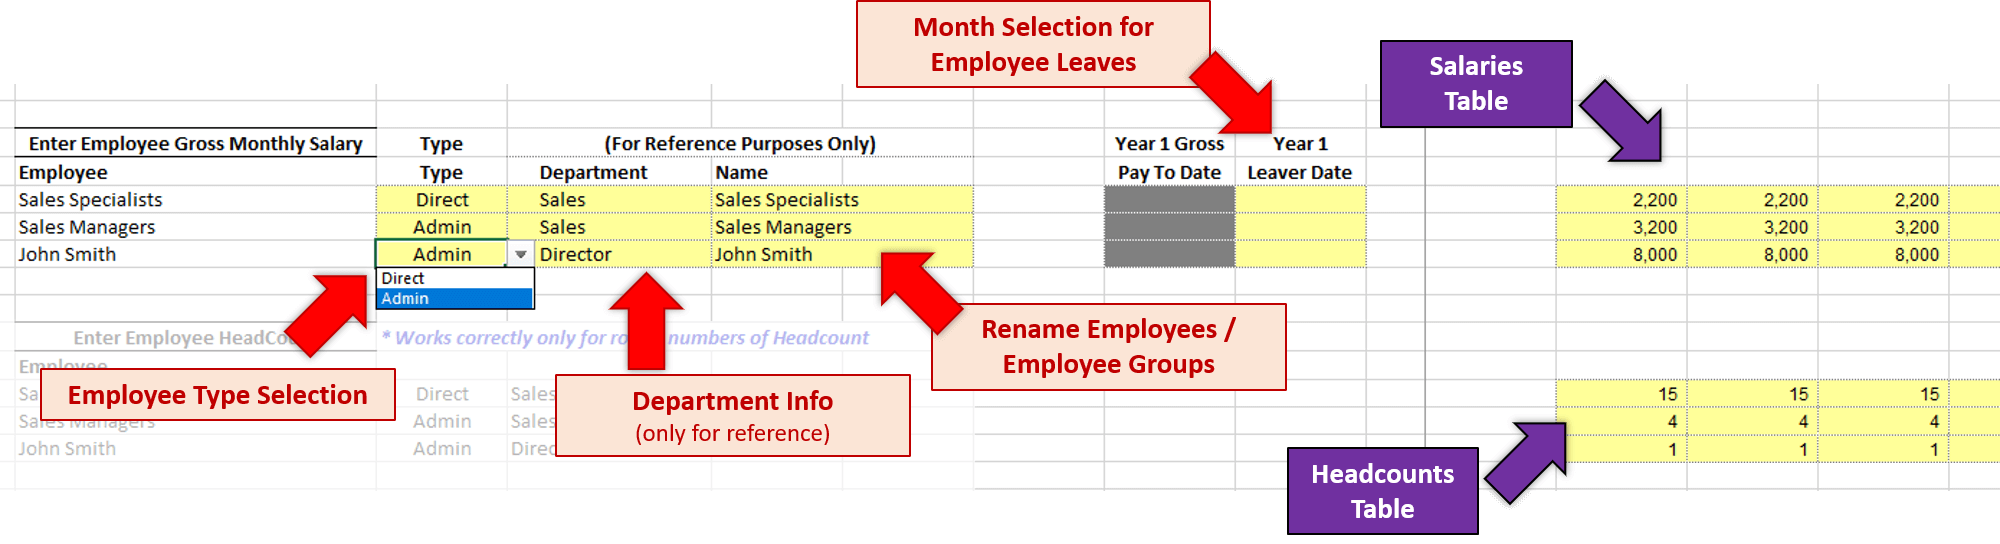
In this example we have added 15 Sales Specialists, 4 Sales Managers and one person (J.Smith) as Director. Specialists and Managers have the same salaries, so we have grouped them together. You can change the employee type, department and leave dates as shown above.
With information populated, all the reports are created automatically:

When you open this menu, the first thing you will notice is the selection at the top of the screen:
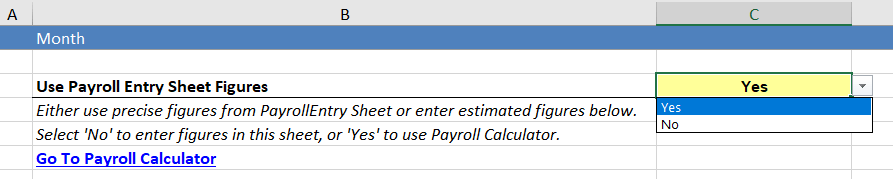
The user can either use the PayrollEntry Sheet to enter precise figures (as explained at 3.4.2 Payroll – Specific) or use this sheet to enter estimated figures. If you don’t want to micro-manageyour payroll, then you can use general estimated figures by selecting “No” from the dropdown.
Please note that, using Payroll-Specific will obviously lead to more accurate results. How much accuracy is needed is up to the user. This is a trade-off after all.
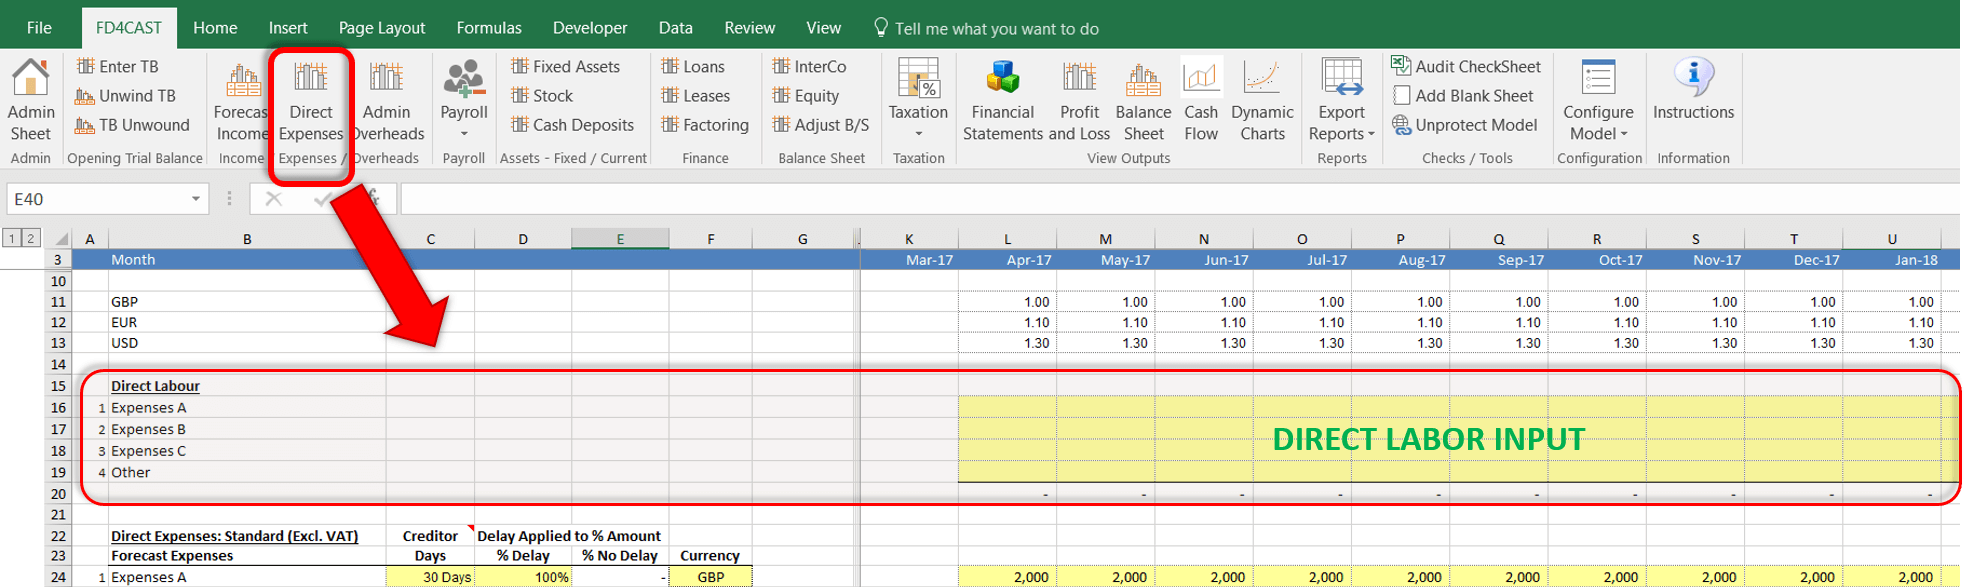
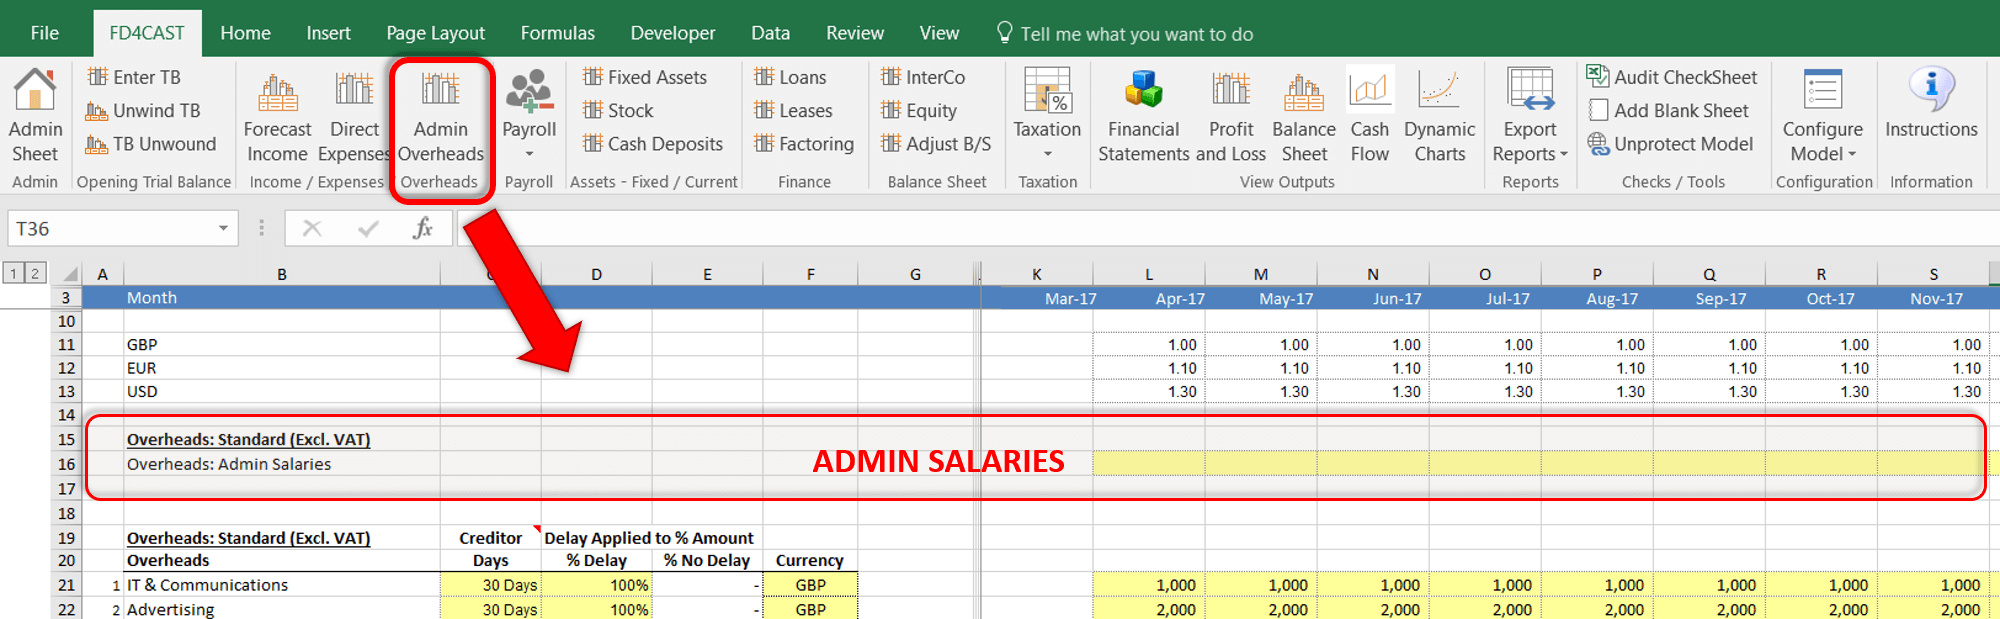
If “No” is selected, then user will input the Net Salaries to the Expense screens:
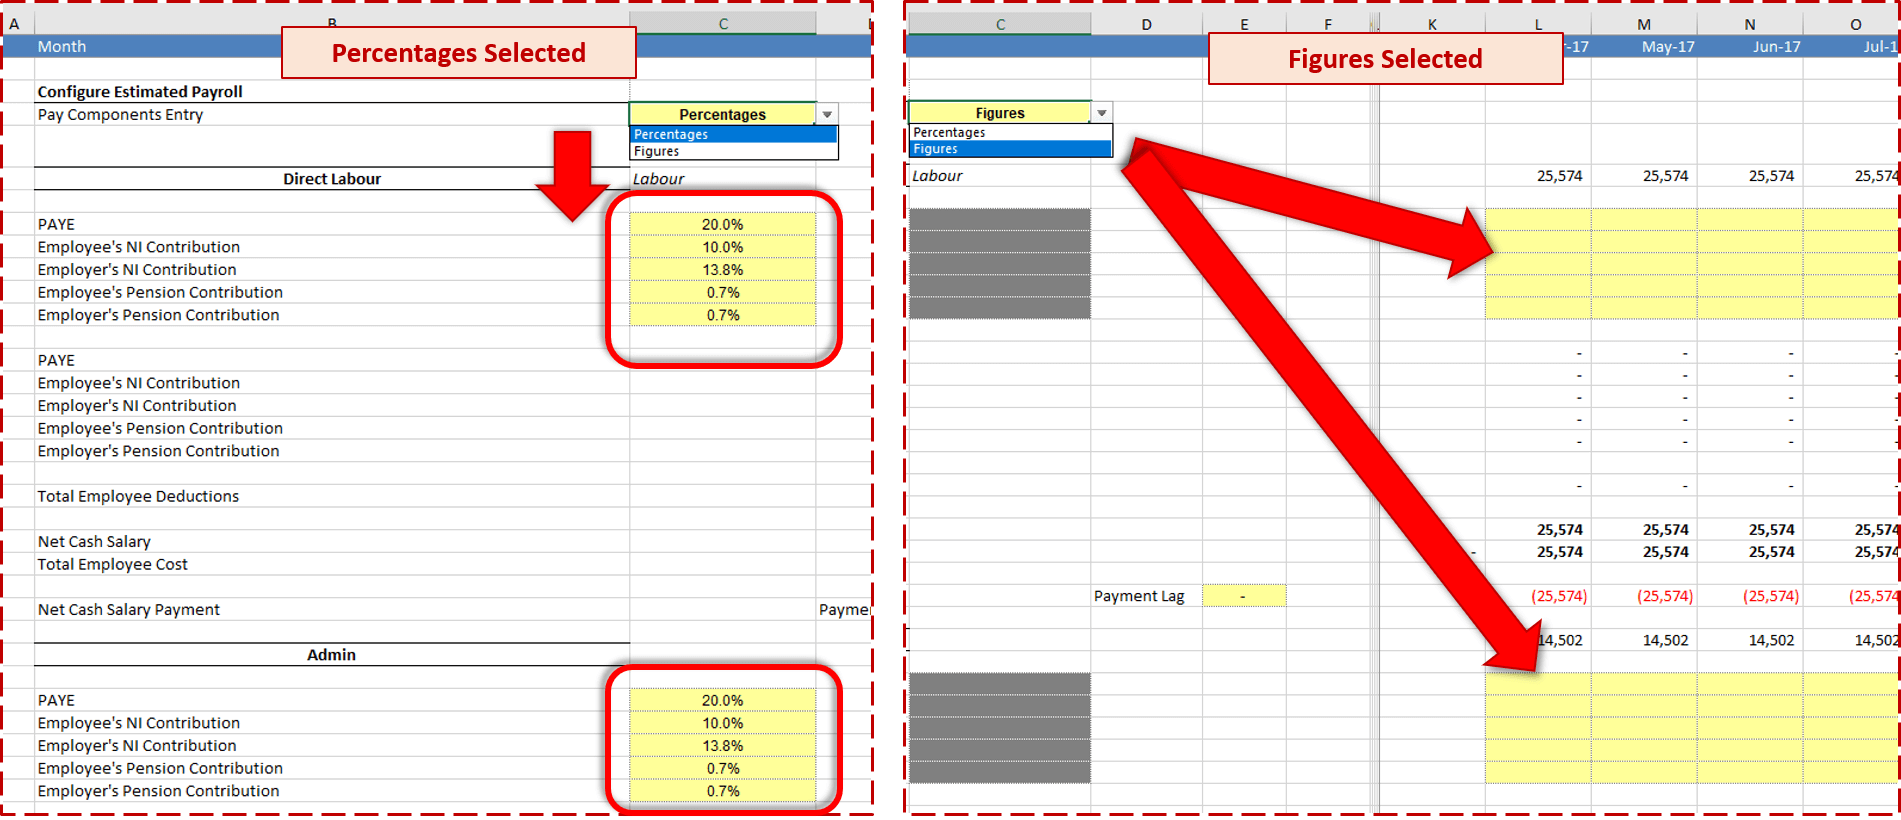
After total net salaries are input for the employee groups, the user should define the tax and contribution distribution. This can either be input as general percentages or absolute figures per month:
The last option for general payroll management is: Payment Lag. This simply postpones the salary payments for each month entered in the Payment Lag cell as shown below:

After all inputs are complete (salaries, taxes and payment lag [optional]), the output reports will be generated at the bottom of the Payroll – General screen.
** In theory, if same values are input on both the specific or general payroll management screens, they should give very close figures as output. However, there may be small differences due to the calculation details at Payroll-Specific. That trade-off should be considered and decided by the user.